
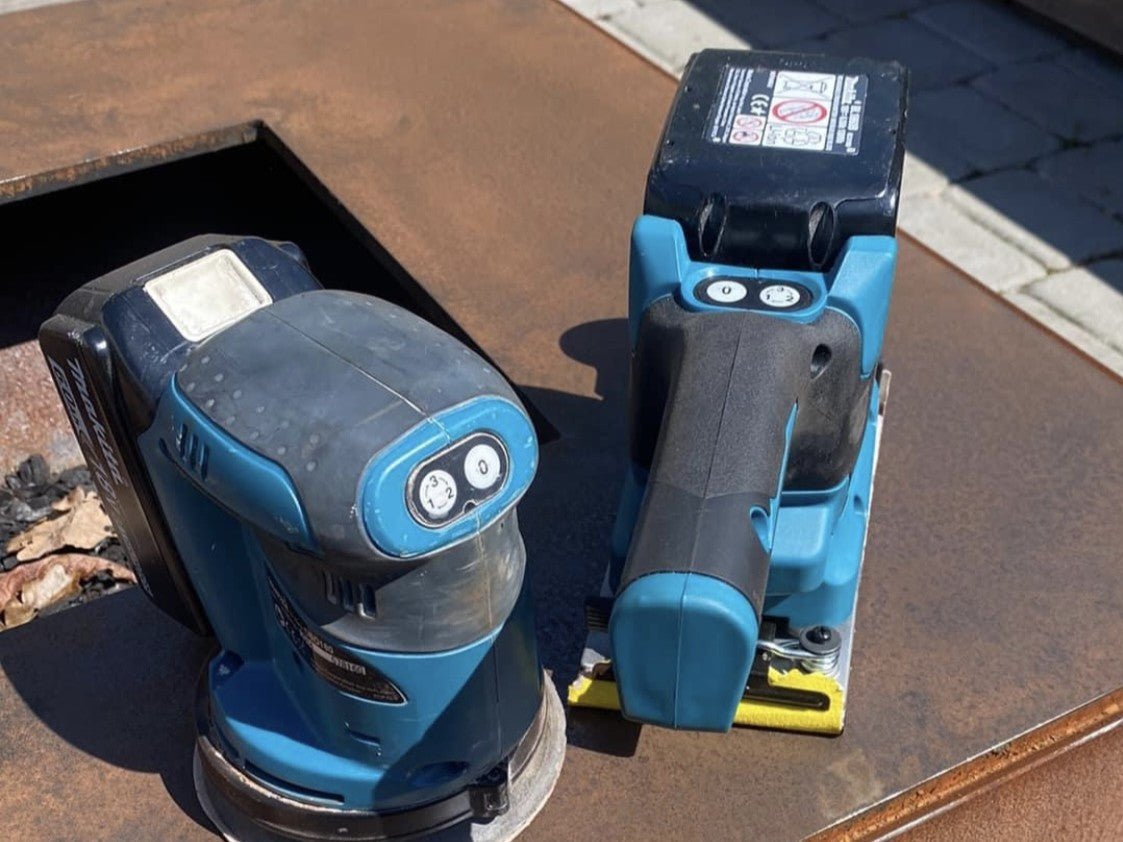
Sanding the fire pit grill plate and grate
How to sand your carbon steel griddle and grate after winter
Carbon steel is a fantastic material for griddles and grates, but it requires a bit of maintenance – especially after a damp winter, where rust can occur. Here is a step-by-step guide on how to effectively remove rust and restore your griddle and grate so it is ready for a new season.
Materials you will need
✔ Sander or sandpaper (grit 80-120)
✔ Oil (e.g., cooking oil, rapeseed oil, or flaxseed oil)
✔ Cloth or paper towels
✔ Brush or steel wool (for heavier rust)
✔ Warm water and mild soap (optional, if needed)
Step 1: Assess the extent of the rust
Take a look at your griddle and grate. If the rust is superficial, a light sanding may be enough. If it is more extensive, you can start with a coarse wire brush or steel wool to loosen the worst rust spots.
Step 2: Sanding the griddle
-
Use a sander or sandpaper
- If you have an electric sander (as shown in the pictures), use one with medium grit (80-120).
- Move the sander in even, circular motions across the entire plate.
-
Manual sanding
- If you don't have a machine, you can use sandpaper and manual power.
- Use long, uniform strokes and make sure to cover the entire surface.
Step 3: Sanding the grill grate
- Use a smaller sander, steel wool, or sandpaper to clean the grill grate.
- Focus on the areas where the rust is worst.
- Make sure to get into the edges and corners of the grooves.
Step 4: Wiping down and cleaning
- Remove dust and rust particles with a dry cloth.
- If necessary, wash the griddle with warm water and mild soap – but remember to dry it thoroughly afterwards to prevent new rust from forming.
Step 5: Oiling for protection
- Pour a small amount of oil onto the griddle and grate.
- Use a cloth or paper towel to spread the oil in a thin layer.
- Heat the grill for about 15-20 minutes until the oil starts to smoke slightly – this creates a protective patina that prevents rust.
💡 TIP: Repeat this process after every season to extend the life of your griddle and grate.
Step 6: Ready for use!
Now your griddle and grate are free of rust and protected against future corrosion. You're ready to grill again! 🔥
The pictures show how you can sand and prepare your grill step-by-step – from the rusty surface to a beautiful, refreshed griddle ready for use.
Get more knowledge and inspiration about fire pit grills and cooking over an open fire on our comprehensive information page.
Happy grilling! 🍖🔥

 Internationales (EUR)
 Dänemark (DKK)
 Norwegen (NOK)
 Schweden (SEK)
 Deutschland (EUR)
 Österreich (EUR)
Hinterlasse einen Kommentar
Diese Website ist durch hCaptcha geschützt und es gelten die allgemeinen Geschäftsbedingungen und Datenschutzbestimmungen von hCaptcha.